


 If you’ve remodeled your home, you know how messy drywall dust can be. Clouds of fine dust can linger in your home and cause cleanup to last weeks after completing your project.
Here are some tips that can help you through your remodeling project.
1. Create a plan.
Before tearing down your walls, please make sure you have a plan. While a “do-it-yourself” project may seem like a good idea, there are many things to consider. Depending on your project, you may need permits from your city’s inspection department. In addition, when talking with them, they may be able to offer you some project tips.
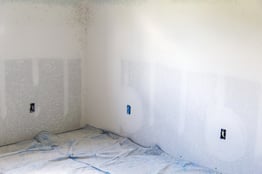
2. Hang plastic sheeting.
Plastic sheeting helps keep the dirt and dust in the work area. It also works well for creating walls to protect other areas of your home. We used it to protect our storage area and the area where our water heater and furnace are located. Doing this minimized the amount of dust in these areas.
3. Turn off your HVAC system.
Depending on the time of year, this may be tough. However, turning off the system can help prevent sending dust throughout your home. If you’re remodeling during winter, consider using alternative heat sources, such as a fireplace or electric heater. After you’ve cleaned the work site and removed as much dust and debris as possible, you can turn it back on.
4. Seal your vents.
To protect your HVAC system and to limit the dust from circulating in the air in your home, seal the vents in the work area. Depending on where you’re working, two types of vents may need to be covered. Registers may be in your floor or ceiling and have the primary job of blowing out the air, which keeps your home cool or warm. Returns or intakes suck the air into your HVAC system. Before sealing them off, make sure you’re aware of their function. You may need to unseal them before turning your system back on. To run efficiently, your furnace needs air. The last thing you want to do is damage it.
5. Buy some box fans.
Again, depending on the season, this may also be challenging. However, putting box fans in several windows throughout your home can help remove the dust. If it’s winter, I’d recommend constantly monitoring the inside temperature. You don’t want your home to get below 55 degrees Fahrenheit.
6. Clean, clean, clean.
While thoroughly cleaning your work area each day can be a nuisance, it’s an excellent way to mitigate the amount of dust. I’ve found that using a push broom doesn’t work well. It seems to stir up the dust more than anything. Therefore, I gently use a regular broom followed by my Shop-Vac®. If you decide to follow this approach, the air filter in your vacuum will need to be cleaned frequently. If you notice a loss of suction, it’s time for a cleaning. Unfortunately, drywall dust can clog it up quickly. In addition, cleaning the rest of your home more regularly during the project can help. It’s amazing how fast dust accumulates.
7. Keep an eye on your furnace filter.
The purpose of your furnace filter is to trap dust and debris, preventing it from traveling throughout your home. The dust in the air can be terrible during a project, especially one involving drywall. Clean your filter regularly to prevent blocked airflow and dust from overwhelming your furnace and home. You’ll want to buy a new one at the end of your project.
8. Buy an air purifier or humidifier.
The job of an air purifier is to clean the air we breathe. It can remove pollutants, allergens, and toxins. While a humidifier can add particles to the air, keeping your home’s humidity at the proper level can help. Moist air is heavier than dry air, preventing dust and other particles from freely floating around your home.
9. Protect your flooring.
There are many products available that can provide protection. Where your project takes place can dictate what type of covering to use. We put down a plastic barrier with an adhesive backing on the stairs leading to the basement. If you have hardwood floors or ceramic tile, you’ll want to use something heavier, such as cardboard. The last thing you want is a dropped hammer denting or cracking your flooring.
10. Develop a plan for sanding.
After the mud and tape on your drywall has cured, it’s time to sand. A manual sanding pad or an electric sander can create a dust storm in your home. Depending on the size of your project, there may be some alternatives available. The method I used was wet sanding. While it may not do as good of a job, it does help keep the dust down. A damp sponge can smear the drywall compound and make your surface smooth. While it’s a bit more time consuming, I think it’s worth it. Plus, if you’re applying knockdown texture to your wall, that can help hide some imperfections.
I hope you found these tips helpful and that your project goes well!
Do you have any suggestions or information you’d like to share? I’d love to hear from you. Please share them in the box below.

